Bike drivetrain maintenance is the repeatable routine of cleaning the chain, cassette, and chainrings, re-lubricating them correctly, and measuring chain wear before it damages more expensive parts. Done regularly, it costs a few minutes and a rag; skipped, it turns a $30 chain replacement into a $200 drivetrain overhaul. A useful routine always has four parts: remove contamination, lubricate correctly, measure chain wear, and investigate any change in shifting or sound.
In this guide
- What a drivetrain is and why maintenance matters
- Tools you need
- The cleaning routine step by step
- Degreasing the cassette and chainrings
- Lubrication: wet lube vs dry lube
- Checking chain wear with a gauge
- Diagnosing shifting and derailleur problems
- Maintenance intervals
- When to see a professional
What a drivetrain is and why maintenance matters
The drivetrain is every part that turns your pedaling into motion: the chain, the front chainrings, the rear cassette, the front and rear derailleurs, the shifters, and the two small jockey wheels (pulleys) in the rear derailleur cage. On most modern bikes these components are machined to tight tolerances and are designed to work as a matched set.
That is exactly why cleanliness matters so much. Road grit and dust are abrasive. When they mix with chain lubricant, they form a dark grinding paste that sits between every roller and pin. Every pedal stroke then drags that paste across the load-bearing surfaces of the chain and the teeth of the cassette and chainrings. A clean, lubricated chain can outlast a neglected one by three to four times, and because the chain is the sacrificial part, keeping it in good shape protects the far more expensive cassette and chainrings from wearing out with it.
There is a performance payoff too. A clean drivetrain shifts crisply, runs quietly, and wastes measurably less pedaling energy to friction. If your bike has started to sound gritty or shift lazily, cleaning is almost always the first thing to try — see why a bike chain makes noise before assuming something is broken.
The routine below applies to road, gravel, and mountain bikes alike. The main difference is frequency: mountain bike drivetrain maintenance happens more often because trail riding throws far more mud, dust, and water at the chain than smooth pavement does.
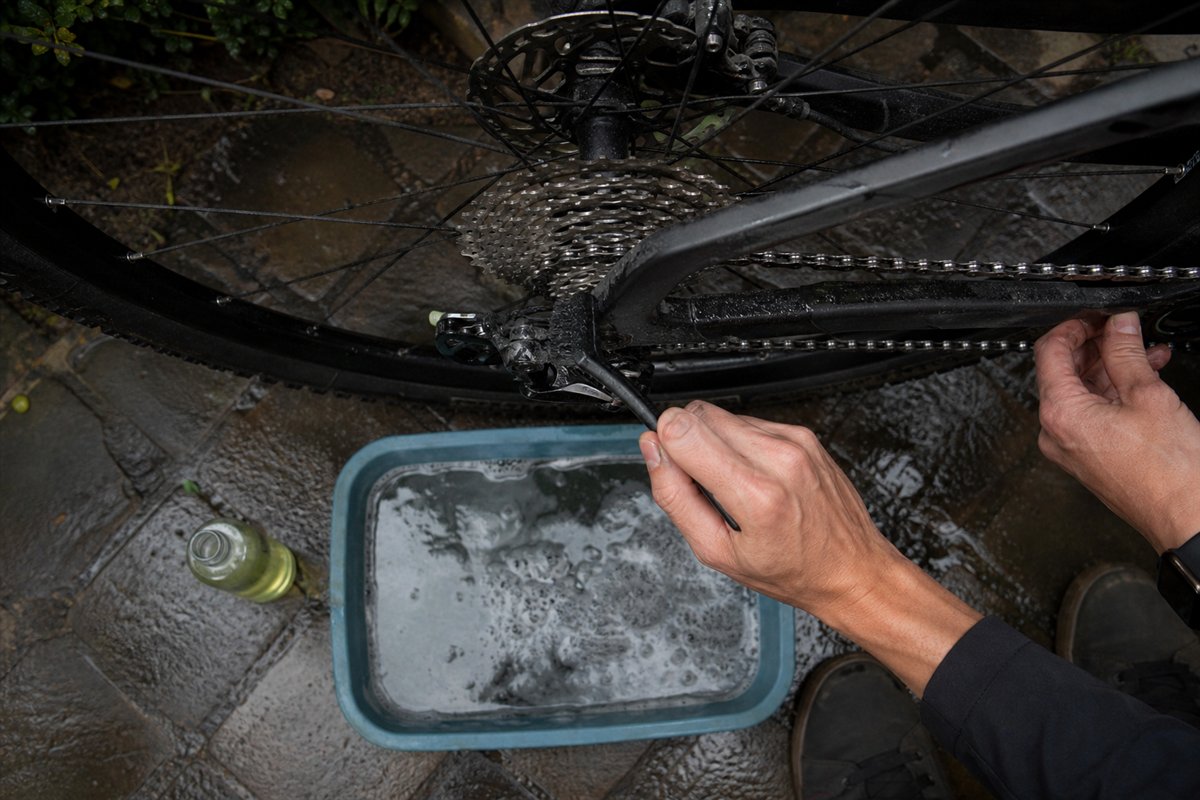
Tools you need
You do not need a professional workshop. A basic kit covers almost every home job:
- A repair stand (or a way to lift the rear wheel so the cranks spin freely). This is the single biggest quality-of-life upgrade.
- A clean, lint-free rag — two or three, actually.
- A stiff-bristled brush and a narrow detail brush for tight spaces between cassette cogs.
- Degreaser — a bike-specific, biodegradable degreaser is safest around seals and paint.
- Chain lubricant — one wet lube and/or one dry lube (covered below).
- A chain wear gauge (also called a chain checker). This is a small, inexpensive tool that pays for itself the first time it saves a cassette.
- Nitrile gloves if you would rather not scrub your hands afterward.
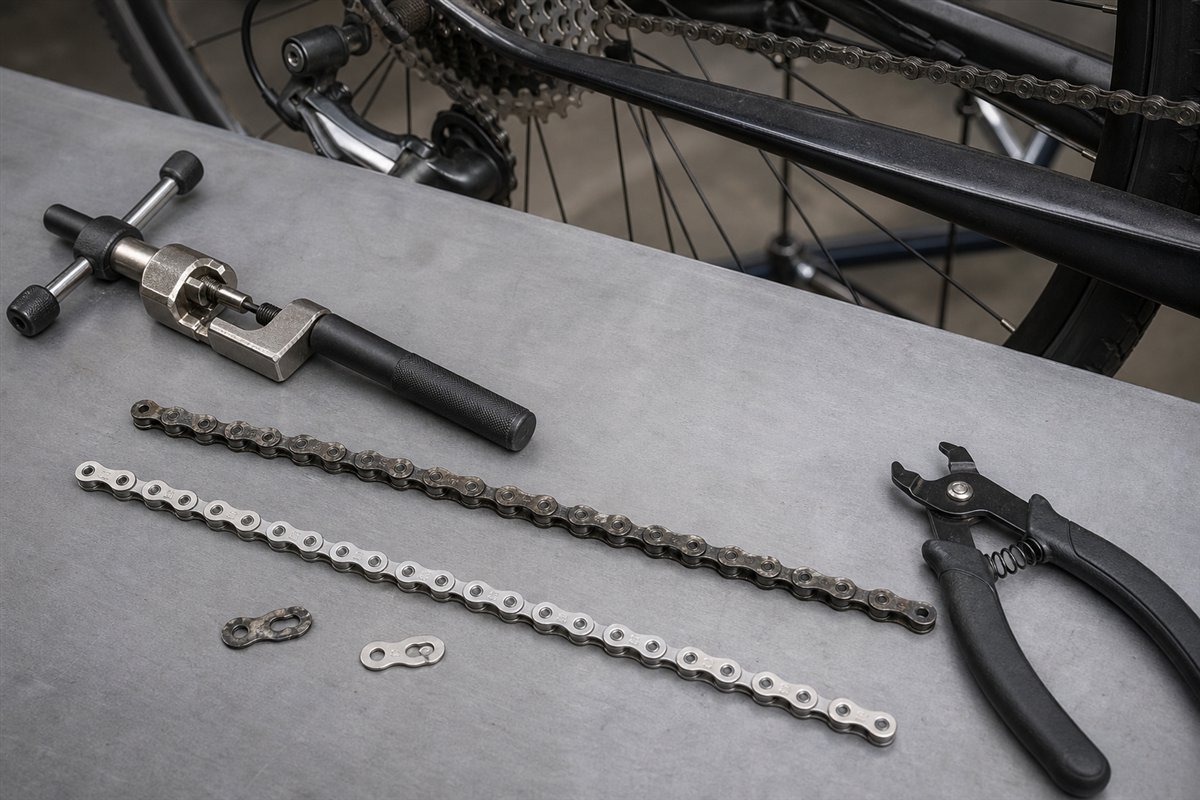
Optional but genuinely useful: a chain-scrubber tool (a clamshell box with internal brushes that you clamp onto the chain and fill with degreaser), a cassette lockring tool if you want to remove the cassette for a deep clean, and a master-link plier if your chain uses a quick link.
A word on degreaser choice, because it trips people up. Citrus and biodegradable degreasers are gentle on paint, seals, and skin and are the right default for a chain you clean regularly. Strong solvent degreasers cut heavy grime faster but can strip a chain of the internal factory grease and are harsher on the environment and your hands. Household products are best avoided: engine degreasers can attack rubber seals, and dish soap is too weak to shift oily grime on its own. Match the strength to the mess — a lightly used road chain needs far less aggression than a caked mountain bike drivetrain after a winter of mud.
Two safety notes worth stating up front. Keep every degreaser and lubricant well away from your brake rotors and pads — contaminated brakes lose stopping power and are difficult to recover. And avoid high-pressure water (pressure washers, strong hose jets) anywhere near hubs, the bottom bracket, headset, suspension, and any motor on an e-bike, because it drives water and grit past the bearing seals.
The cleaning routine step by step
How deep you go depends on how dirty the bike is. The two situations below cover most riders.
After ordinary dry rides
For a bike that has only seen dry pavement, a full degrease every ride is overkill. Instead:
- Backpedal the cranks while holding a clean rag firmly around the chain. Let the chain run through the rag for a dozen full rotations.
- Grip the top and bottom runs of the chain in turn to wipe all four sides.
- Watch and listen as it spins: look for stiff links that jump, debris packed around the derailleur pulleys, and any grinding noise.
- If the chain looks clean and the surface is not caked, re-lube (see below). The chain should end up clean and dry to the touch, not visibly wet with oil.
This “wipe and re-lube” takes two minutes and, done every 100 to 200 miles, prevents most grime from ever building up.
After wet or muddy rides
Water and mud demand more. Rain washes lube out of the rollers and leaves the bare metal exposed, so a wet ride that is left overnight can start surface rust by morning.
- Rinse loose mud off with a gentle flow of water — never a high-pressure jet near bearings or seals.
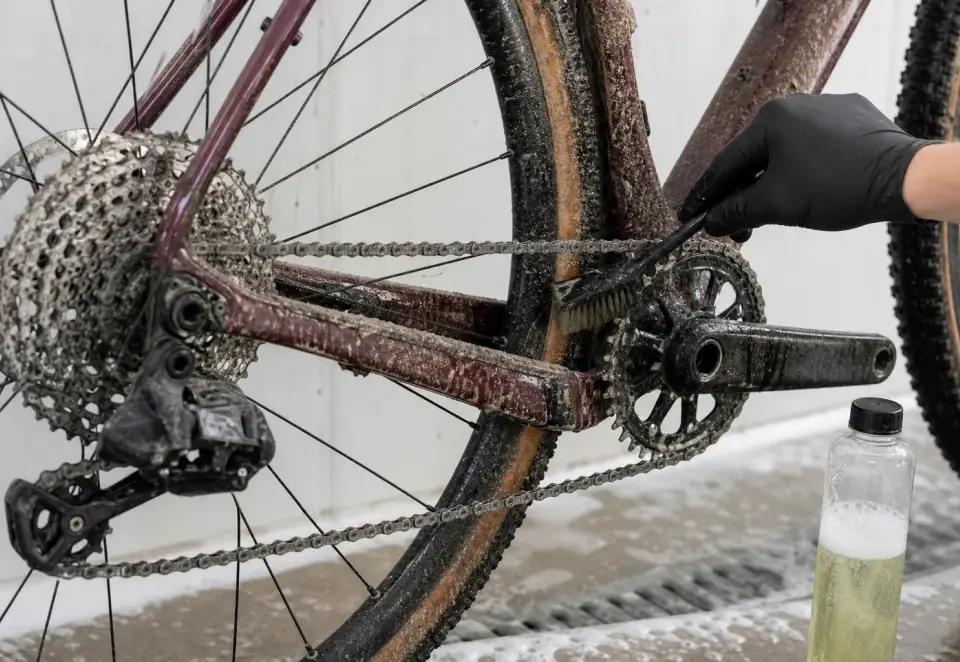
- Work degreaser into the chain with a brush, then scrub the cassette, chainrings, and pulley wheels. A chain-scrubber tool makes the chain itself much easier.
- Rinse the degreaser away and dry the whole drivetrain thoroughly with a rag. Drying is not optional — lube will not bond to a wet chain, and trapped water rusts.
- Only once everything is dry, apply lubricant and wipe off the excess.
Mud is the fastest way to wear out a mountain bike drivetrain, so after any genuinely muddy ride, treat cleaning as mandatory rather than optional. For a fuller walkthrough dedicated to this task, see how to clean a bike drivetrain.
Degreasing the cassette and chainrings
The chain gets most of the attention, but the cassette and chainrings quietly collect their own grime — you will often find a black ring of built-up gunk on the sides of the cogs and a “shark-tooth” line of dirt along the chainrings.
For a moderate clean, leave the cassette on the wheel. Fold a degreaser-soaked rag into a strip and floss it back and forth in the gaps between the cogs, then follow with a stiff detail brush. Brush degreaser onto both chainrings and clean the derailleur pulleys, which pack with a surprising amount of dirt and directly affect shift quality.
For a deep clean — worth doing once or twice a season, or when the drivetrain is genuinely filthy — remove the rear wheel and take the cassette off with a lockring tool so you can scrub each cog individually and clean the freehub body underneath. Reinstall to the manufacturer’s lockring torque so it does not work loose.
Whatever depth you choose, rinse and dry completely before lubing. Any degreaser left on the chain will thin and break down the fresh lube you apply next.
Here is a clear video walkthrough of the full clean-degrease-lube sequence if you prefer to watch it done:
Lubrication: wet lube vs dry lube
Lubricant belongs inside the chain, on the rollers and pins where metal moves against metal. A shiny coating on the outside of the plates does nothing useful and only attracts dirt. This is why the golden rule of chain lubing is: apply generously into the rollers, then wipe all the excess off the outside.
How to apply it
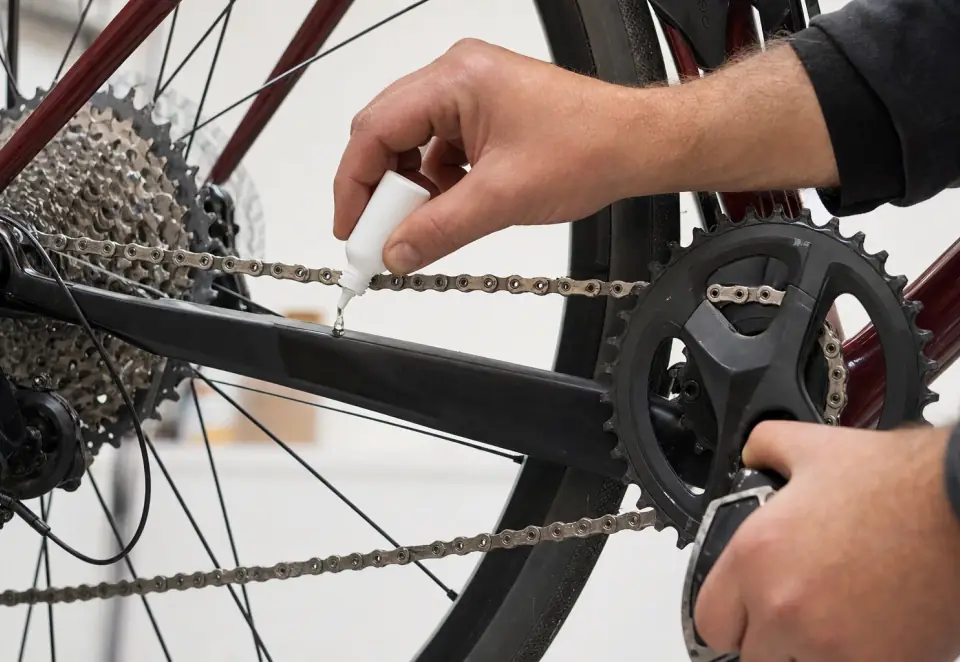
- With the chain clean and completely dry, hold the lube bottle over the lower run of chain, just ahead of the rear derailleur.
- Backpedal slowly and lay down one drop of lube per roller (per link) for a full rotation of the chain. One controlled pass is enough — you are aiming to wet every roller once, not to soak the chain.
- Let the lube settle into the rollers for a minute or two (longer for wax-based lubes, which need time to penetrate).
- Grip the chain in a clean rag and backpedal several rotations to wipe every drop off the outside. The chain should look almost dry when you finish. This step is what keeps the chain clean between rides.
Over-lubing is the most common home mistake. A wet, dripping chain flings oil onto the rim and collects grit into a black paste — the exact thing you were trying to avoid.
Choosing between wet and dry lube
The two families of lube are built for opposite conditions. Wet lubes are oil-based, stay on through rain, and last many miles, but they hold onto dirt. Dry lubes are carried in a solvent that evaporates and leaves a waxy, dirt-shedding film, but they wash off quickly in the wet and need reapplying often.
| Property | Dry lube | Wet lube |
|---|---|---|
| Best conditions | Dry, dusty, summer roads and trails | Rain, mud, winter, long tours |
| Keeps chain clean | Yes — sheds dirt well | No — attracts grit |
| Water resistance | Low — washes off in rain | High — stays put |
| Reapply every | ~60–100 miles | ~150–300 miles |
| Main drawback | Frequent reapplication | Must wipe hard or it collects grime |
Many riders keep a bottle of each and match the lube to the forecast. If you only want one, choose based on where you ride most: dry lube for dry climates, wet lube for wet ones. For a deeper look at timing, see how often to lube a bike chain.
Checking chain wear with a gauge
Cleaning and lubing extend a chain’s life, but every chain eventually wears out. As the rollers and pins wear, the effective spacing across the links grows — commonly (if imprecisely) called “stretch.” A worn chain no longer meshes cleanly with the cassette teeth, so it starts to reshape those teeth to match itself. Catch it in time and you replace only the chain; catch it late and you replace the cassette and often the chainrings too.
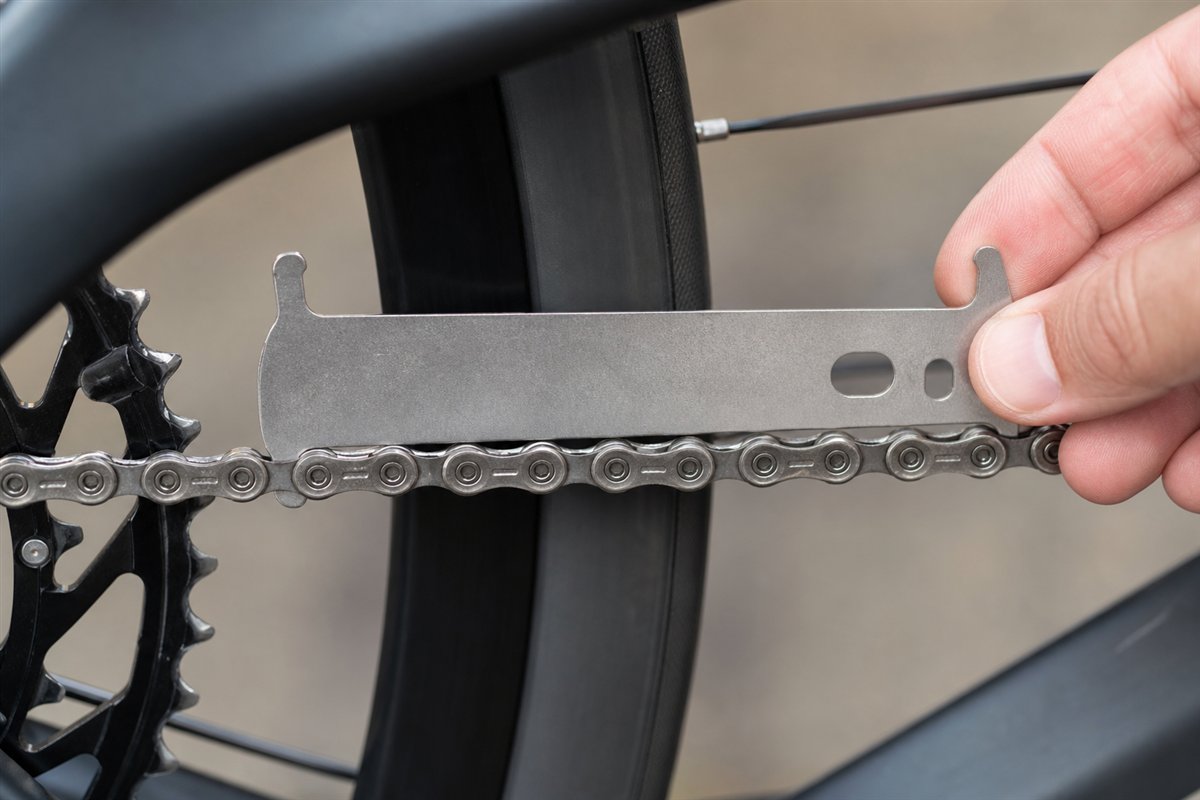
Do not try to judge wear by mileage or by eye — the only reliable method is a gauge. To use one: clean the chain first, then rest the gauge onto the chain and let its far tooth try to drop into a roller gap. If it drops fully to the marked line, the chain has reached that wear percentage. Check two or three different sections of the chain rather than trusting a single spot.
The replacement threshold depends on your drivetrain. Modern chains have narrower components with less material to give, so they must be replaced sooner:
| Drivetrain | Replace chain at | Notes |
|---|---|---|
| 12-speed (and most 11-speed) | 0.5% wear | Narrow chains wear the cassette fast past this point |
| 8-, 9-, 10-speed | 0.75% wear | More tolerant; can safely run a little longer |
| Single-speed / internal hub | ~1% (varies) | No cassette to protect; follow chain maker’s spec |
A chain that reads past 0.75% has almost certainly worn the cassette with it, which is why a new chain on an old cassette then skips under load. Replacing at 0.5% on a modern drivetrain is not fussiness — it is the difference between a $30 part and a $250 one. For the full method and threshold detail, see how to check bike chain wear and when to replace a bike chain.
Diagnosing shifting and derailleur problems
Once the drivetrain is clean and the chain is within spec, most shifting complaints come down to a handful of causes. Work through them in order, because a dirty drivetrain masks everything else — always clean first, diagnose second.
- Slow or hesitant shifting: usually dirty or dry cables and housing, or a dirty derailleur pulley. Clean the pulleys and, if it persists, the cables may need lubricating or replacing.
- Chain skips under load but shifts fine at rest: the classic signature of a worn chain on a worn cassette. A gauge check confirms it. See chain skipping under load.
- Won’t reach the largest or smallest cog, or overshoots into the spokes: the derailleur limit screws (marked H and L) need adjustment.
- Chain rattles or ghost-shifts between two gears: indexing is off; a small turn of the barrel adjuster usually dials it back in.
- Shifting that suddenly went bad after a crash or transport: suspect a bent derailleur hanger — the small replaceable bracket the rear derailleur bolts to. A bent hanger throws off every gear and needs realigning or replacing.
If cleaning and a barrel-adjuster tweak do not restore clean shifting, the underlying cause is usually cable, hanger, or worn components rather than something you can lube away.
Maintenance intervals
The right interval depends far more on conditions than on a fixed calendar. Rain, mud, dust, and long high-power rides all shorten every number below. Treat these as sensible defaults, then clean sooner whenever the drivetrain looks or sounds gritty.
| Task | Dry / road riding | Wet / mountain / heavy use |
|---|---|---|
| Wipe and re-lube chain | Every 100–200 miles | Every ride, or after any wet/muddy outing |
| Brush cassette, chainrings, pulleys | Monthly | Every 1–2 weeks |
| Full degrease of drivetrain | Every 1–2 months | Monthly, or when caked |
| Check chain wear with gauge | Every ~500 miles or monthly | Every 200–300 miles |
| Deep clean (cassette removed) | Once or twice a season | Several times a season |
The habit that matters most is the quick post-ride wipe-and-lube. It takes two minutes, prevents the grime from ever building into paste, and does more for chain life than any occasional deep clean.
A few conditions justify tightening every interval further. Salted winter roads are extremely corrosive, so rinse and re-lube after every ride in road-salt season even if the bike looks clean. Coastal and beach riding carries the same salt risk. Bikepacking or touring under a heavy load puts more tension on the chain, so lube more often on long trips than the mileage alone suggests. And a brand-new chain benefits from a wipe and re-lube within the first ride or two, because factory assembly lube is not intended as a long-term chain lubricant — clean it off and apply your own.
When to see a professional
Home maintenance handles the vast majority of drivetrain care, but some jobs are worth handing to a shop with the right tools and torque wrenches:
- Persistent poor shifting after you have cleaned, lubed, checked the hanger, and adjusted the barrel — the cause may be internal cable routing or a component out of spec.
- A bent derailleur hanger, which needs a specific alignment gauge to correct precisely.
- Replacing a worn cassette or chainrings, which requires the correct lockring and crank tools and torque values.
- Anything on an e-bike near the motor, where water intrusion and torque sensors make DIY riskier.
- Any cracked chain plate, protruding pin, or link you cannot free — a chain that fails under load is a crash risk, so if in doubt, do not ride it.
None of this replaces a mechanic’s judgment on a specific bike. Generic guidance cannot confirm that your bicycle is safe to ride. When something feels wrong and cleaning does not fix it, stop and have a qualified mechanic look at it.
Frequently asked questions
What is drivetrain maintenance?
Drivetrain maintenance is the routine of cleaning the chain, cassette, and chainrings, checking chain wear with a gauge, inspecting shifting, and re-lubricating. Keeping the drivetrain clean can extend chain life several times over compared with running it dirty.
How often should you clean a bike drivetrain?
Wipe and re-lube the chain every 100 to 200 miles or after any wet or muddy ride, and do a deeper degrease of the cassette and chainrings monthly or when the drivetrain looks gritty. Riding in rain and mud shortens these intervals.
How do you maintain a bike drivetrain at home?
Clean the chain, degrease the cassette and chainrings, dry everything, apply a suitable wet or dry lubricant one link at a time, then wipe off the excess. Check chain wear with a gauge each time and replace the chain before it passes its wear threshold to protect the cassette.
Wet lube or dry lube — which should I use?
Use dry lube in dry, dusty conditions because it sheds dirt and leaves a cleaner chain, but reapply it often since it washes off in rain. Use wet lube for wet, muddy, or long rides because it stays put, but wipe the chain hard afterward or it collects grit. Many riders keep both and match the lube to the forecast.
Can a dirty drivetrain damage my bike?
Yes. A gritty chain acts like grinding paste, accelerating wear on the chain, cassette, and chainrings and forcing you to replace all three at once instead of just a worn chain. A neglected drivetrain also shifts poorly and wastes pedaling energy, so routine cleaning is the cheapest maintenance you can do.
Continue the topic
More drivetrain care guides
 How Often Should You Lube a Bike Chain?
 How to Clean a Bike Drivetrain Without Causing Damage
 When to Replace a Bike Chain
Watch the technique
How To Clean, Degrease and Lube a Bike Chain
Video by RJ The Bike Guy · Watch on YouTube